What's new in v2?
- Outbound-only connectivity: No inbound firewall rules or port forwarding are required, the beacon initiates the tunnel automatically.
- Automatic CIDR detection: The beacon discovers reachable CIDRs from the host network interfaces. A beacon can also analyze multiple CIDRs.
- Automatic internal IP discovery: Once the tunnel is up, Ethiack automatically discovers reachable IPs within the exposed CIDRs after you add them to a test.
- Scalable deployments: Deploy using a single install script, an Ansible playbook, raw Kubernetes YAML, or a Helm chart.
1. Requirements
Host / VM Requirements (Install Script)
|
Requirement |
Details |
|
OS |
Debian-based Linux (Ubuntu, Debian). Other distributions may work but are not officially supported. |
|
CPU |
2 vCPU minimum |
|
RAM |
2 GB minimum |
|
Docker |
Recommended but optional. If not installed, the script defaults to native mode |
|
Architecture |
amd64 or arm64 |
Note: Docker is the recommended deployment method (easier to manage, no system changes beyond Docker itself). If Docker is not installed, you can install it by following the official Docker documentation.
Kubernetes Requirements
|
Requirement |
Details |
|
Linux capabilities |
NET_ADMIN and SYS_MODULE must be granted to the container |
|
Architecture |
amd64 or arm64 |
Network Requirements
|
Direction |
Protocol |
Destination |
Purpose |
|
Outbound |
HTTPS (TCP 443) |
api.ethiack.com |
Beacon registration and health reporting |
|
Outbound |
UDP |
beacon-rh.ethiack.com |
Tunnel establishment |
|
Outbound |
HTTPS (TCP 443) |
europe-docker.pkg.dev |
Container image pull (public, no auth required) |
|
Internal |
Any |
Your internal CIDRs |
The beacon host must be able to reach the networks it exposes |
Important: The beacon machine must have network access to the internal CIDRs you intend to expose. If the host sits in a DMZ or restricted VLAN, ensure routing to those subnets is in place before deploying.
2. Deployment Options
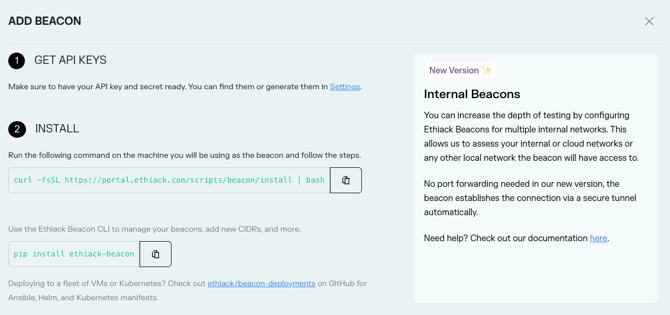
As a quick start, navigate to https://portal.ethiack.com/surface/beacons and follow the on-screen instructions. Please note that only one beacon per network is required.
All methods use the same public container image:
europe-docker.pkg.dev/ethiack/public/beacon:latest
|
Method |
Target Environment |
Recommended For |
|
Install Script |
Single VM |
Quick setup, single machine |
|
Ansible |
Fleet of Linux VMs (EC2, on-prem, bare-metal) |
Teams managing multiple hosts |
|
Kubernetes YAML |
Kubernetes cluster (no Helm) |
Platform/infra teams |
|
Helm |
Kubernetes cluster (Helm-managed) |
Helm-based workflows |
Option A: Single VM / Quick Install
Best for a single VM or quick proof of concept. The install script detects whether Docker is available and prompts you to choose between Docker (recommended) or native mode. Both configure everything in one shot and set the beacon up as a system service that auto-restarts on reboot. Native mode attempts to install multiple dependencies automatically on the host
- Retrieve your API Key and API Secret from the Ethiack Portal Settings.
- Run the install script on the target machine:
Interactive:curl -fsSL https://portal.ethiack.com/scripts/beacon/install | bash
Non-interactive (automated / scripted):ETHIACK_API_KEY=your_api_key \
ETHIACK_API_SECRET=your_api_secret \
ETHIACK_BEACON_NAME=your_beacon_name \
ETHIACK_ASSUME_DETECTED_CIDRS=1 \
curl -fsSL https://portal.ethiack.com/scripts/beacon/install | bash
Note: You can unset the environment variables after the beacon is running, if you prefer. By default, it will attempt to create a new pentest scope for the beacon. But you can also provide ETHIACK_PENTEST_SLUG=example-m6 to use an existing one or manually add assets to any test, e.g. if you only want to test specific internal IPs and avoid active reconnaissance. - Verify the beacon is running by analyzing the output of the command
Then go to Portal > Beacons and confirm the beacon status is Active. It should appear within a minute of the service starting.
Option B: Scalable Deployments (Ansible, Helm, Kubernetes YAML)
- Clone or download the templates from: https://github.com/ethiack/beacon-deployments
- Provide your credentials and beacon name:
- ETHIACK_API_KEY
- ETHIACK_API_SECRET
- ETHIACK_BEACON_NAME
- Configure network scoping: set ETHIACK_BEACON_CIDRS (e.g., 10.0.0.0/8) or use ETHIACK_ASSUME_DETECTED_CIDRS=1 for automatic detection. Please note that if neither variable is set, the beacon will fail to start with an error.
After deploying, confirm beacons appear as Active in the portal.
3. Network Scoping (CIDRs)
You can control which internal networks the beacon exposes in two ways:
|
Method |
When to use |
|
Automatic detection |
The host has a simple network setup and you want to expose all directly reachable subnets. |
|
Manual CIDRs (ETHIACK_BEACON_CIDRS) |
You want to restrict scope, or the host has many interfaces (VPNs, Docker networks, etc.) and auto-detection picks up unintended ranges. |
Example: restrict to a specific subnet:
ETHIACK_BEACON_CIDRS=10.10.0.0/16
Multiple CIDRs can be comma-separated, e.g. 10.10.0.0/16,192.168.1.0/24.
DNS:
DNS Forwarding is handled automatically. The beacon starts a dedicated dnsmasq instance that captures your existing nameservers and forwards queries. No manual configuration needed.
4. Managing Your Beacons (CLI)
Install the Ethiack Beacon CLI on the beacon host:
pip install ethiack-beacon
beacon --help

Or via Docker:
docker exec ethiack-beacon beacon --help
Common Commands
|
Command |
Description |
|
beacon list |
List all registered beacons |
|
beacon create |
Register and start a new beacon |
|
beacon delete <id> |
Delete a beacon and stop the tunnel |
5. Adding Internal Assets
During beacon create, you are prompted to set up pentest scope automatically. The default option creates a new pentest named after your organisation and beacon, adds your CIDRs to its scope, and starts the pentest immediately.
You can also:
- Add CIDRs to an existing pentest by selecting "Add to an existing pentest" during the create step, or by passing --pentest-slug <slug> / ETHIACK_PENTEST_SLUG=<slug>.
- Skip scope configuration entirely with --skip-pentest-config / ETHIACK_SKIP_PENTEST_CONFIG=1 and add assets manually later in the Ethiack Portal.
Once a beacon is Active, the Ethiack Engine automatically discovers reachable IPs within the exposed CIDRs and begins assessment.
6. Uninstalling a Beacon
On a VM (install script):
-
Docker
# List beacons to retrieve the ID
docker exec ethiack-beacon beacon list
# Remove the beacon
docker exec ethiack-beacon beacon delete <beacon-id>
# Stop the service from the beacon directory
docker compose down - Native install
# List beacons to retrieve the ID
beacon list
# Remove the beacon (stops all services, and deletes from Portal)
beacon delete <beacon-id>
# Stop and disable the system service
systemctl stop ethiack-beacon
systemctl disable ethiack-beacon
You can also remove the beacon entry from the Portal > Beacons page if it wasn't deleted via the CLI.
7. Troubleshooting
Beacon registers but stays "Offline"
-
- The most common cause is a firewall blocking outbound UDP to beacon-rh.ethiack.com. Confirm the UDP port shown in the portal is open outbound from the beacon host.
- Check the service logs:
- docker logs ethiack-beacon (Docker)
- journalctl -u ethiack-beacon -f (Native)
Setup fails with "iptables not available"
Some minimal OS images (containers, stripped VMs) do not include iptables. Install it (apt-get install iptables) or redeploy using the Docker install method, or Ansible.
Beacon fails to start (Kubernetes)
-
- Ensure the pod has NET_ADMIN and SYS_MODULE capabilities. Without these, we cannot configure the network interface.
CIDRs not detected correctly
-
- Override automatic detection by setting ETHIACK_BEACON_CIDRS explicitly (see Section 3).
- Auto-detection may pick up unintended interfaces (Docker bridge networks, VPN tunnels). Use manual CIDRs for precise control.
pip install ethiack-beacon fails with "externally managed environment"
-
- This is a restriction on newer Ubuntu/Debian systems. Use pipx instead or create a virtual environment:
pipx install ethiack-beacon
Beacon is active but internal IPs are not being discovered
-
- Verify the beacon host can actually reach the exposed CIDRs (test with ping or curl from the host and the container).
- Ensure no host-based firewall (e.g., ufw, iptables) is blocking traffic to internal subnets. If you are reusing a machine from a previous beacon version, it’s recommended to create a new one.
Reach out to our support team via the support portal (support.ethiack.com).